

Getting Started with Terraform
First Steps, Useful Tools, and Hands-On Example
Contents
Introduction
Terraform has become one of the most widely adopted Infrastructure as Code (IaC) tools, enabling teams and individuals to define, provision, and manage infrastructure using human-readable configuration files. Whether you are exploring cloud computing for the first time or expanding your skills, Terraform offers a consistent, provider-agnostic approach that supports all major cloud platforms, on-premises environments, and numerous SaaS services. Because of its modular structure, declarative language, and predictable workflow, Terraform is often the first IaC tool recommended to developers, system administrators, DevOps engineers, and cloud learners.
The goal of this article is to help new learners take their first practical steps with Terraform by focusing on the essentials needed to get started quickly and safely. We outline the most common options for setting up a learning environment such as installing Terraform locally, using a browser-based sandbox, running Terraform inside cloud-provided shell environments, or using cloud simulators like LocalStack. To make the learning experience as accessible as possible, we include a simple configuration example that requires no cloud accounts or paid resources, helping you understand the core concepts, such as providers, state, variables, modules, and outputs, before moving on to more advanced topics.
By the end of this guide, you will know the available options for running Terraform for the first time, understand the benefits and limitations of each approach, and be equipped with the tools and examples needed to confidently begin your Terraform learning journey.
Installing Terraform Locally
Overview
Installing Terraform directly on your workstation is one of the most straightforward and flexible ways to begin learning the tool. A local installation provides full access to the Terraform command-line interface (CLI), supports offline experimentation, and enables you to test configuration files without depending on cloud-based environments or external sandboxes. This approach is ideal for learners who want full control over their setup and prefer working in familiar environment.
A local installation also helps new users understand how Terraform interacts with the filesystem and manages state files.
Once Terraform is installed, you can use a simple text editor or an IDE such as Visual Studio Code to write your first configuration
and begin practicing Terraform's core workflow: terraform init, terraform plan, terraform apply,
and terraform destroy.
The instructions provided below are based on the assumption that you have permission to install binaries or modify your system's
PATH and that you are familiar with the basic system administration tasks.
Installing Terraform on Linux
Linux users can install Terraform either by downloading the official binary from HashiCorp or by using supported package
managers. The most reliable method is to download the .zip package directly from the HashiCorp release site,
extract it, and place the Terraform binary into a directory included in your PATH (such as
/usr/local/bin or $HOME/bin). This guarantees that you are using the latest stable version, which
is particularly important because many Linux distribution repositories lag behind in version updates. After installation,
you can verify success by running terraform version.
For example, use the following commands to install Terraform v1.14 on Ubuntu:
Another convenient option is to install Terraform through the official HashiCorp Linux repository, which supports Debian-based, Red Hat-based, and other distributions. This method ensures Terraform is managed through your system's package manager, making it easy to update or remove later.
To install Terraform through package manager, follow the steps for your system outlined in the Terraform installation document.
Installing Terraform on Windows
Installing Terraform on Windows can be done by downloading the official ZIP archive, extracting the terraform.exe
binary, and adding its location to the system or user PATH through the Windows environment variable settings. This method
works on all supported Windows versions and ensures you have full control over the installation location.
Once Terraform is installed, you can open PowerShell or Command Prompt and run terraform version to confirm the
installation.
For example, use the following PowerShell commands to download Terraform v1.14 on Windows:
Using the Terraform Sandbox
The HashiCorp Terraform Sandbox is an official interactive, browser-based environment provided by HashiCorp that allows you to experiment with Terraform without installing anything on your local machine.
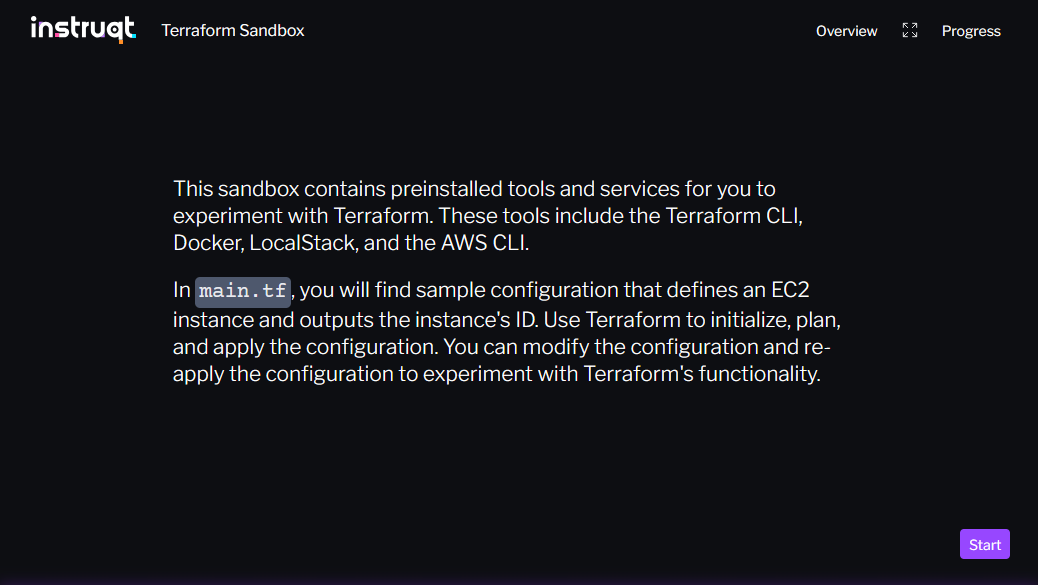
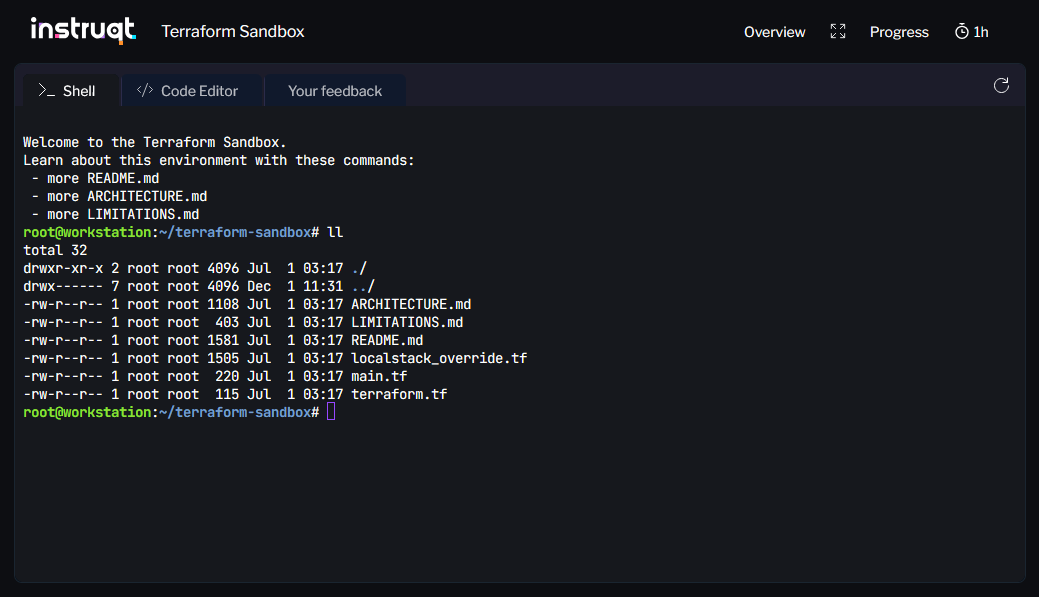
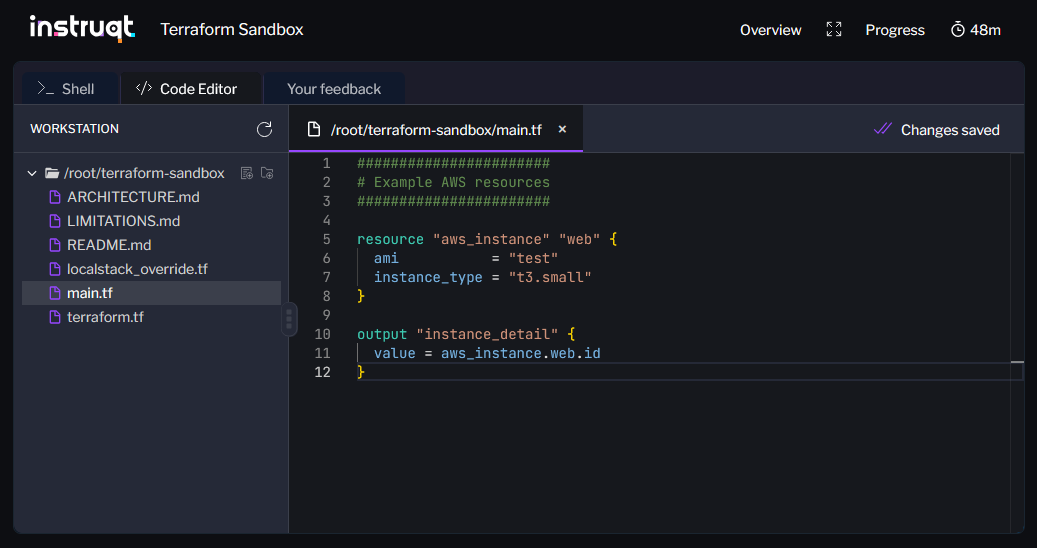
Once you launch a sandbox session, you're presented with a terminal interface in your browser. Terraform is preinstalled in the sandbox, along with key supporting tools such as Docker, LocalStack (AWS simulator), Code Editor, and the AWS CLI.
Sandbox sessions run for a limited time (up to one hour), which is generally enough for hands-on experiments, tutorials, or simple configuration testing. Because the environment is pre-configured, there is no need to worry about installing dependencies or setting up paths. This makes the Terraform Sandbox particularly well suited for beginners or for users on restricted machines.
Preinstalled LocalStack and AWS CLI provide an opportunity to also learn and test AWS-targeted Terraform configurations without interacting with real cloud resources.
Keep in mind, the sandbox doesn't retain your state files or configuration between sessions. If you want to preserve your work, you must manually copy out files or use Git/remote storage.
How the Terraform Sandbox can Fit into Your Learning Path
For a new Terraform learner, the Terraform Sandbox is arguably the fastest low-friction way to get started. Use it to:
- get familiar with the CLI and basic workflow (init, plan, apply, destroy),
- test simple configurations (local resources, file writes, modules, etc.),
- follow official tutorials step-by-step without worrying about environment setup or costs,
- experiment with provider configurations (e.g., AWS via LocalStack) without needing cloud credentials.
Once you feel comfortable, and especially if you want to build persistent infrastructure or collaborate via version control, consider migrating to a local installation or cloud-based setup.
Using AWS LocalStack
Overview
LocalStack is an open-source cloud service emulator that allows you to run AWS-like APIs on your local machine. For Terraform learners, it offers an excellent way to practice configuring AWS resources without needing an AWS account, paying for real cloud services, or worrying about accidental charges. LocalStack supports a large subset of core AWS services, such as S3, IAM, Lambda, DynamoDB, SNS, and SQS, making it ideal for hands-on experimentation during early Terraform learning stages.
Using LocalStack with Terraform allows you to simulate real AWS workflows, including planning and applying infrastructure changes, interacting with AWS APIs, and observing how Terraform state behaves. Because LocalStack runs locally (in a Docker container), resource creation is extremely fast and does not require authentication, IAM setup, or network access to AWS. This accelerates learning: you can write, modify, and destroy Terraform configurations repeatedly without waiting for real cloud infrastructure to deploy.
LocalStack integrates easily with Terraform using custom endpoints or provider configuration overrides. Many new learners use LocalStack to practice essential Terraform topics such as resource attributes, dependencies, provider configuration, outputs, and state management without the complexity of cloud accounts. While it is not a perfect replication of AWS, it closely matches enough functionality for meaningful, cost-free Terraform practice.
Installing LocalStack
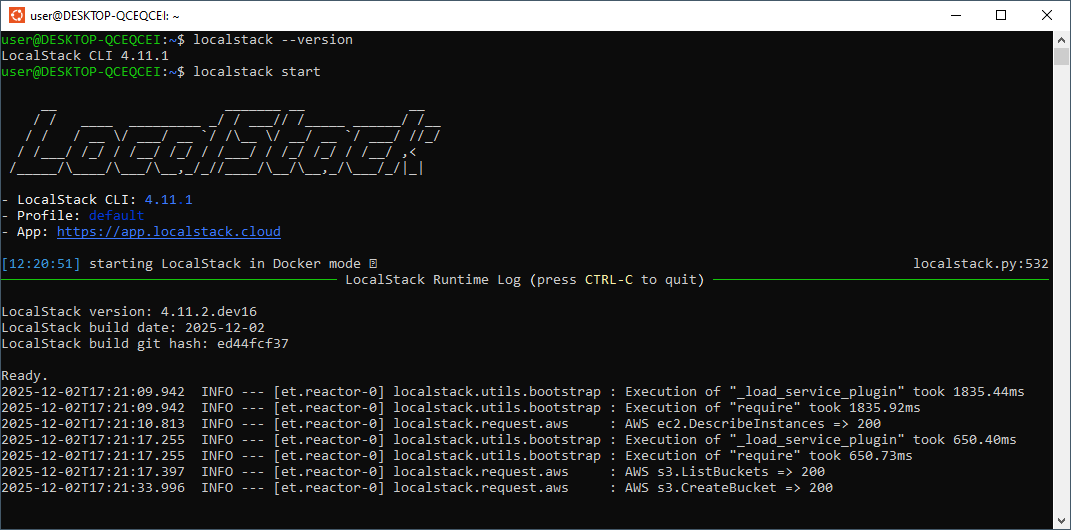
The most simple way to start with LocalStack is to use the LocalStack CLI. Once installed, CLI can be used to start and manages the LocalStack Docker container.
Use the following commands to install and run LocalStack on a Linux machine:
Note: The machine must have a working Docker installation.
We also recommend installing the
LocalStack AWS CLI (awslocal) which allows you to run AWS CLI commands against the LocalStack environment without the need to
specify the --endpoint-url parameter.
Using Terraform with LocalStack
Once running, LocalStack exposes AWS-compatible endpoints on your local machine. Terraform can then target these
endpoints using configuration overrides. Save the following configuration in a file named provider.tf
and include it in your Terraform configuration.
Once configured, Terraform behaves as if it is managing AWS resources, only everything is created locally. You can create
S3 buckets, queues, IAM users, and more, just as you would with real AWS. Running terraform apply results in instant
provisioning because no network calls to AWS are required. This environment is ideal for practicing core Terraform concepts:
state files, provider operations, resource lifecycle, and dependency.
LocalStack works especially well as a "bridge" between purely local Terraform examples and full cloud Terraform deployments.
Running Terraform in CloudShell (AWS, GCP, Azure)
Running Terraform directly in a cloud provider's browser-based shell environment is one of the most convenient ways to begin experimenting without installing anything locally. CloudShell environments, offered by AWS, Google Cloud Platform (GCP), and Microsoft Azure, run in the cloud, come with preinstalled tools, and automatically authenticate you with your cloud account. This makes them an excellent option for new learners who are not yet comfortable managing local installations or configuring access keys. Using CloudShell is also useful for more advanced practitioners who need a controlled, secure environment to prototype infrastructure changes, run commands quickly, or perform tasks from any device.
Each provider's CloudShell service is slightly different, but they share a common goal: provide a ready-to-use, browser-accessible Linux shell with persistent storage, integrated SDKs, and secure access to your cloud resources. All three major services support installing or running Terraform with minimal setup. Users can clone Git repositories, paste or upload configuration files, small scripts and modules, and then walk through the standard Terraform workflow (init, plan, and apply). Because CloudShell environments are isolated by design, users can experiment with new tools and program versions without modifying their workstation.
However, learners should be aware of CloudShell limitations. The environments typically offer only a small amount of disk space (1-5 GB), impose session timeouts, and may require reinstallation of user-added tools avery time a new session is launched. Additionally, deploying real resources in a cloud environment incurs charges, so careful cost monitoring and management is recommended. For many learners, though, CloudShell remains one of the simplest ways to try Terraform against a real cloud provider with minimal friction.
Using Terraform in AWS CloudShell
AWS CloudShell is a browser-based terminal that automatically authenticates your to AWS and provides access to the AWS CLI, SDKs, and common development tools such as vim, Git, pip, and npm. Because CloudShell session runs inside your AWS environment, you can create, modify, and destroy AWS resources, assuming your IAM user has sufficient permissions, without manually configuring access keys or credentials.
Terraform is not preinstalled in CloudShell, but you can add it easily by following the standard installation steps from
the Terraform installation documentation.
If you need details about the underlying OS, you can inspect /etc/os-release. At the time of writing, AWS CloudShell
is based on Amazon Linux 2023.
CloudShell provides 1GB of persistent storage for your home directory. All files and programs stored there remain available across sessions. However, anything installed or added outside the home directory is lost when the session ends. CloudShell also shuts down automatically after 20-30 minutes of inactivity. For a complete list of limitations, refer to the AWS CloudShell User Guide.
The 1GB storage limit can be a challenge when running Terraform workflow from within your home directory. Note that AWS Provider alone is roughly 800MB in size.
To work around the home directory space limitation, you can:
- Use a Terraform working directory outside your home directory and clone your configuration files from a
Git repository,
or - Create a provider plugin cache folder outside your home directory:
sudo mkdir /tf-plugin-cache
sudo chmod a+w /tf-plugin-cache
export TF_PLUGIN_CACHE_DIR="/tf-plugin-cache"
The steps above must be repeated every time a new CloudShell session is started.
Despite these limitations, AWS CloudShell remains a practical option for small to medium Terraform experiments and is especially useful for learners who want to explore AWS infrastructure without managing a full local development environment.
Using Terraform in Google Cloud Shell
Google Cloud Shell offers one of the most complete out-of-the-box experiences for running Terraform. Cloud Shell provides
a full-featured Ubuntu 24.04 LTS environment, 5GB of persistent storage, and a built-in browser version of VS Code.
It also includes the gcloud CLI, gsutil, docker, kubectl,
terraform (v1.5), git, pip and other tools for development and resource management
on Google Cloud.
If required, you can add the latest Terraform version by following the standard installation steps from
the Terraform installation documentation.
To make the change permanent, copy the binary into $HOME/bin.
GCP Cloud Shell is well-suited for learning Terraform and experimenting with GCP resources in small environments. Watch out for session timeouts and the limited persistent disk. Also note that some operations requiring large compute resources or long-running tasks may hit Cloud Shell quotas and limits.
Using Terraform in Azure Cloud Shell
Azure Cloud Shell provides a browser-based ready-to-use Bash or PowerShell environment, complete with Azure CLI support, Microsoft's SDKs, and automation tools, including Kubectl, Helm, Ansible, Packer. Terraform is also preinstalled in Azure Cloud Shell, which makes it extremely convenient for learners. Creating or editing Terraform files can be done with the built-in code editor or by pulling sample configurations with Git.
When you start Cloud Shell for the first time, you have the option of using Cloud Shell with or without an attached storage account. Using Cloud Shell without storage is known as an ephemeral session. When ephemeral session ends, all user's files are deleted and don't persist across sessions.
If you want store files that can be used every time you use Cloud Shell, you must create new or choose existing storage account. Cloud Shell persists your files in your $HOME location using a 5GB file share.
Use of the machine hosting Cloud Shell is free. Storage account incurs regular costs.
The wide range of tools preinstalled on Azure Cloud Shell makes it very useful not only for learning Terraform but for real-world automation tasks as well. Limitations include the need for storage account management and session timeouts.
A Simple Terraform Configuration Example
Before working with cloud resources, it's helpful for new Terraform users to understand the core structure and workflow of a Terraform project using a simple configuration that doesn't require access to AWS, Azure, GCP, or any external APIs.
The following example configuration demonstrates how to use Terraform features such as providers, variables, locals, modules, outputs, and state, all within a self-contained directory. You only need Terraform installed locally or access to a shell environment where Terraform is available. No cloud accounts or credentials are required.
Configuration Components
Version Requirements
Each Terraform configuration should include a terraform block specifying the minimum required Terraform version
and the providers the configuration depends on. This ensures consistency and prevents unexpected behavior if someone runs the
configuration with an outdated version.
Providers
Providers (required_providers {...}) are plugins that allow Terraform to interact with external systems
such as cloud services, SaaS tools, or local utilities. In this example we use the
HashiCorp Local Provider
(hashicorp/local), which can create files or directories on your local machine, and the
HashiCorp Random Provider
(hashicorp/random), which allows the use of random values within Terraform configurations.
Variables
Variables allow your configuration to be flexible and reusable. You can define them in your configuration files and pass values
from CLI, environment variables (TF_VAR_xxxx), or a terraform.tfvars file.
Locals
Locals let you define named expressions or derived values that you can reuse throughout your configuration. They help reduce duplication and improve clarity.
Resources
In Terraform, resources are the most fundamental building block. A resource represents an object that Terraform manages such as a local file, a storage bucket, or a cloud instance. When you apply a configuration, Terraform creates, updates, or destroys resources so that the real-world infrastructure matches your configuration files.
Modules
Modules allow you to structure Terraform code into reusable components. Here, we create a small module that accepts a filename
and content, then uses the local provider to create the file.
Calling the file_writer module from the root module's main.tf:
Outputs
Outputs expose values after Terraform applies the configuration. They can display information to the user or make generated values available to other resources or modules.
Data Sources
A data source allows Terraform to read or retrieve information about a resource without creating or modifying anything. Data sources are useful when configuration needs reference values, external metadata, or computed properties.
Using the local provider, you can experiment with reading existing local files. This helps to understand the
difference between managed resources (which Terraform creates/manages) and data sources (which Terraform queries/read-only).
Putting it All Together
Directory structure:
Configuration files:
Exploring Terraform Workflow
After creating your Terraform configuration, you can use it to walk through the full Terraform workflow and build confidence with key commands. The following steps illustrate how Terraform initializes a working directory, analyzes changes, applies updates, and manages state.
Initialize the Working Directory
Once your configuration files are ready, run:
terraform init
This command:
- downloads the required provider plugins (e.g.,
hashicorp/localandhashicorp/random), - and prepares the working directory for use.
What to observe:
- Installed providers and modules are listed in the terminal.
- A
.terraformdirectory appears in the working directory. - A
.terraform.lock.hclfile appears in the working directory.
Try this:
- Run
terraform validate. - Run
terraform modules. - Run
terraform providers.
Preview Changes with terraform plan
The terraform plan command helps to understand how Terraform interprets the configuration and allows to review
the planned changes (execution plan) before modifying anything.
terraform plan
You should see the planned actions such as:
- "+ create" for new resources,
- "~ update" for modified resources,
- "- destroy" for removed resources,
- "-/+ destroy and then create replacement" for replaced resources.
Apply the Configuration with terraform apply
To create (or update) the infrastructure run:
terraform apply
What to observe:
- Terraform will show the execution plan again and ask for confirmation.
- Upon
terraform applycompletion, the output values are listed in the terminal. - The state file (
terraform.tfstate) is created/updated with information about the resources. - A
messages.txtfile is created in the working directory.
Try this:
- Run
terraform applyagain. - Delete
messages.txtand re-runterraform apply. - Run
terraform apply -var "user_name=John". - Run
terraform apply -var "user_name=John" -var "message=Good Day".
Explore Terraform State and Outputs
Terraform state tracks the real-world objects under Terraform’s management. To inspect what Terraform knows, try:
terraform show
terraform state list
terraform state show random_pet.companion
terraform state show data.local_file.file_to_read
terraform output
Explore the Terraform Console
The Terraform console is an interactive REPL (Read-Eval-Print Loop) that helps you evaluate expressions, test variables, and inspect configuration values. Start with:
terraform console -var "user_name=John" -var "message=Good Day"
Then try:
var.user_name
var.message
upper(var.message)
local.file_content
random_pet.companion
module.write_to_file.content
data.local_file.file_to_read.content_md5
Destroy the Managed Infrastructure with terraform destroy
To remove all resources managed by Terraform run:
terraform destroy
This command completes the full lifecycle of Terraform-managed objects. It deletes all resources and clears state.
Summary
This no-cost, no-cloud Terraform configuration example is an excellent starting point for new learners because it:
- requires no cloud accounts, credentials, or paid resources,
- demonstrates main Terraform building blocks,
- illustrates the full Terraform workflow (init, plan, apply, and destroy),
- teaches foundational concepts such as providers, variables, modules, outputs, and state.
Once learners are comfortable with this structure, transitioning to cloud providers becomes much easier because the underlying concepts remain the same.
More Terraform Tutorials
Understanding Terraform Variable Precedence
Terraform Value Types Tutorial
Terraform count Explained with Practical Examples
Terraform for_each Tutorial with Practical Examples
Exploring Terraform dynamic Blocks with GCP Examples
Working with External Data in Terraform
Terraform Modules FAQ